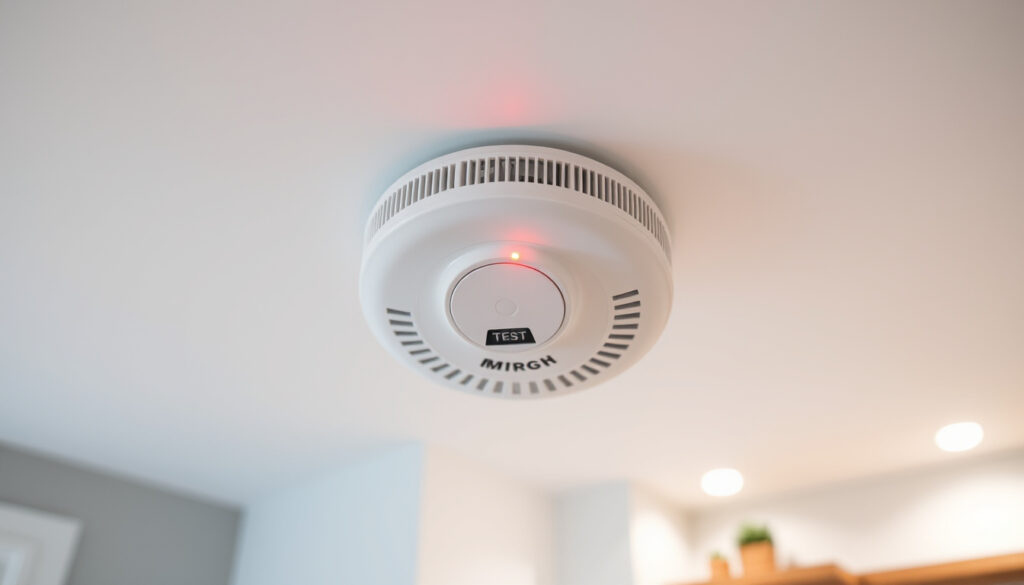
How to Test Smoke Detectors: Step-by-Step Guide
If your smoke detector hasn’t chirped in months, that silence might feel like good news. But here’s the uncomfortable truth: a detector that never sounds off may not be working at all. This guide walks you through every testing method, including what triggers false alarms, how hardwired detectors differ, and what that blinking green light actually means.
Test Button Hold Time: 5–10 seconds ·
Test Frequency: Monthly ·
Alarm Replacement: Every 10 years ·
Top False Alarm Causes: Dust, steam, chemicals
Quick snapshot
- Self-test capability varies by hardwired model (NACHI Forum)
- Exact circuitry verification differs by manufacturer (NACHI Forum)
- Smoke alarms should be replaced every 10 years (Allstate)
- Interconnected systems may trigger cascade alarms (Siterwell Home)
- Weak or absent alarm = replace batteries immediately (Allstate)
- Persistent false alarms = clean sensor or relocate unit (BRK Electronics)
The following key facts come from established safety organizations and manufacturer guidance.
| Factor | Standard Value | Source |
|---|---|---|
| Standard Test Method | Test button press | Allstate |
| Hold Time | 5–10 seconds | Kidde |
| Expected Response | Loud beeps | Allstate |
| Minimum Distance from Cooking | 10 feet | Vivint |
| False Alarm Root Causes | Dust, insects, humidity | YouTube Smoke Alarms |
| Battery Replacement Cycle | Every 6 months | Allstate |
How do you test if a smoke detector is working?
The most reliable way to check a smoke detector takes under a minute. Allstate advises pressing and holding the test button until you hear a loud, ear-piercing siren—a weak or missing sound means the batteries need replacing or the unit itself has failed.
Using the test button
- Press and hold the test button for 5–10 seconds
- Use a broom handle if the detector is mounted high
- Alert family members first—the alarm is intentionally loud
- Station someone at the furthest point in the home to verify audibility
What to listen for during test
A working detector produces a loud, continuous beeping pattern that cuts through background noise. The International Fire and Safety Journal notes that if the sound is muffled, inconsistent, or absent, battery replacement should be your first troubleshooting step before considering unit replacement.
“Push the test/hush button for a minimum of 5 seconds to verify the alarm is functioning properly.”
— Kidde Support (Smoke alarm manufacturer guidance)
Detectors mounted on ceilings over 10 feet high are easy to ignore. A monthly 30-second test is the only way to confirm the alarm will actually wake you during a fire—this isn’t the place to skip due to inconvenience.
How to test smoke detector without test button?
Not every smoke detector has an obvious test button, and some situations call for alternatives. According to home inspection professionals, if your detector lacks a test button, start by checking the power source—battery-operated units will show battery status indicators, while hardwired units should have a constant power connection.
Safe smoke simulation methods
- Use smoke detector test spray designed for this purpose
- Try a small amount of incense in a well-ventilated area
- Keep flammable materials at a safe distance
- Avoid candles or open flames near the sensor
Battery check alternatives
If you cannot trigger a test, inspect the battery compartment directly. DIY maintenance tutorials recommend pressing and holding the test button while changing batteries to discharge residual charge—this ensures the detector resets properly rather than chirping continuously after battery replacement.
Test spray and smoke simulation only verify the sensor works—not the entire alarm circuitry. For hardwired detectors, the test button remains the most comprehensive check available to homeowners.
How to test a smoke detector with smoke?
Testing with actual smoke is the most realistic verification, but it carries risks. Safety experts strongly advise against using real smoke from candles or matches, as this can contaminate the sensor chamber and damage the detector over time.
Controlled smoke test steps
- Use only manufacturer-approved test aerosols
- Apply in small, controlled amounts per product instructions
- Test in open areas away from flammable materials
- Ensure proper ventilation during and after testing
Safety precautions
Never hold burning materials near the detector. Consumer safety guidance emphasizes that contaminating the sensor with soot or residue from open flames compromises real-fire detection capability—the opposite of what you’re trying to verify.
For most homeowners, the test button covers 95% of what matters: confirming the alarm can sound. Smoke-based testing is primarily useful for installers verifying sensor response after cleaning or relocation.
What can falsely set off a smoke detector?
False alarms are frustrating, but they’re also diagnostic clues. ADT’s home safety research identifies steam, cooking fumes, dust, and chemicals as the most common culprits—and recognizing these patterns helps you address the root cause rather than disabling the detector.
Common household triggers
- Steam from showers or boiling pots
- Cooking smoke from burnt food
- Fireplace smoke drifting indoors
- Excess dust during renovation projects
- Low batteries causing erratic behavior
- Bugs crawling into the sensor chamber
Ozone and ammonia effects
Certain airborne chemicals can trigger photoelectric sensors by mimicking smoke particles. Vivint’s technical guidance explains that humid air carries dense water particles which the detector’s optical chamber may confuse for actual smoke—a particular problem in bathrooms and kitchens without adequate ventilation.
Detectors installed near kitchens catch fires faster but trigger nuisance alarms more often. The NFPA recommends at least 10 feet from cooking appliances, but placement ultimately requires balancing response time against false-alarm frequency for your specific household patterns.
Do hardwired smoke detectors self test?
Hardwired smoke detectors are powered by your home’s electrical system with battery backup—but that doesn’t mean they self-diagnose sensor failure. Home inspection professionals note that the test button on hardwired units verifies the backup battery and alarm siren function, not the electronic smoke sensor itself.
Self-test features
- Some advanced models perform periodic circuit checks
- Smart detectors may run internal diagnostics and report via app
- Interconnected systems can identify which unit triggered an alarm
- Visual indicators (LED patterns) signal different operational states
Manual test requirements
Even detectors with self-test features require monthly manual verification. Kidde’s technical documentation outlines the reset procedure for hardwired units: disconnect power, remove the backup battery, press the test button for five seconds, then reconnect power—this process ensures the capacitor fully discharges before the system restarts.
“A hardwired unit will chirp once when power is restored but should not chirp afterward—if it continues, investigate further.”
— Kidde Support (Smoke alarm manufacturer guidance)
Upsides
- Test button confirms battery backup and siren function
- Interconnected units pinpoint problem locations via LED flash
- Smart models offer app-based diagnostics
- Backed by household electrical system during power outages
Downsides
- Test button doesn’t verify smoke sensor circuitry
- Power fluctuations (“dirty power”) can trigger false alarms
- Solar systems may create electrical irregularities
- Sensor contamination from dust or insects still causes nuisance alarms
Homeowners with hardwired systems should still press the test button monthly—the self-test features found in some advanced models handle circuit diagnostics but can’t verify the smoke sensor itself.
Smoke detector indicator lights explained
That little blinking light on your smoke detector communicates more than you might realize. Kidde’s technical support documentation specifies that during alarm mode, an initiating unit will flash RED or GREEN at least once per second—a pattern that persists for 1.5 seconds every 10 seconds even after the alarm stops, helping you identify which detector triggered first.
- Solid green: Unit has continuous power, normal operation
- Flashing green: Unit is receiving AC power and batteries are functional
- Red flash (once per second): Unit is in alarm mode
- Red flash (every 10 seconds): Unit previously alarmed, needs attention
- No light: Unit has no power—check circuit breaker or battery
For interconnected systems, troubleshooting guides recommend systematically checking each unit after a false alarm to locate the initiating detector—look for the flashing indicator pattern rather than pulling units off the ceiling at random.
A missing indicator light is often the first sign of a power problem. Before assuming the detector is dead, check your circuit breaker—if the light is out on multiple units, a tripped breaker is more likely than simultaneous detector failure.
Smoke detector maintenance checklist
Testing the alarm is only part of the picture. Comprehensive home safety maintenance requires regular attention to the physical unit, placement, and environmental factors that affect performance over time.
This checklist covers the essential maintenance tasks that keep smoke detectors functioning reliably throughout their lifespan.
| Task | Frequency | Notes |
|---|---|---|
| Press test button | Monthly | Hear loud, continuous beeping |
| Replace batteries | Every 6 months | Or when low-battery chirping starts |
| Vacuum sensor chamber | Every 6 months | Use soft brush attachment |
| Wipe exterior | Quarterly | Dust accumulation interferes with sensors |
| Replace entire unit | Every 10 years | Check manufacture date on back |
| Check placement distance | Annually | Minimum 10 feet from cooking appliances |
| Verify interconnected function | Annually | Trigger one unit, confirm all sound |
The implication: a detector that passes the button test may still have a contaminated sensor or improper placement. Regular visual inspection and cleaning extend both the unit’s functional lifespan and your safety margin.
Troubleshooting persistent false alarms
When your smoke detector keeps sounding without reason, BRK Electronics’ technical resources identify three primary causes: sensor contamination from dust or debris, insect intrusion into the detection chamber, and excessive humidity reaching the unit from nearby bathrooms or HVAC vents.
- Clean the sensor chamber with compressed air or a soft brush
- Inspect for and seal any entry points where insects might enter
- Relocate units more than 10 feet from steam sources
- Avoid installing near air conditioning vents or doorways with drafts
- Use the hush/silence button rather than removing batteries
- Consider photoelectric detectors for kitchens (fewer cooking false alarms)
What this means: disabling the detector by removing batteries puts your household at immediate risk. Consumer safety guidance explicitly warns against this practice—use the hush button, clean the unit, or relocate it, but never disconnect the power source.
Related reading: power outages · cheap electricity
Frequently asked questions
Should a green light be on a smoke detector?
Yes. A solid or flashing green light typically indicates the detector has power and is functioning normally. A missing green light suggests the unit is not receiving power—check your circuit breaker or battery backup.
What does a flashing green light mean on a smoke alarm?
A flashing green light usually confirms the detector is receiving AC power and its backup battery is functional. The exact pattern varies by manufacturer—consult your user manual for specifics.
How often should you replace smoke detectors?
Replace the entire smoke detector unit every 10 years, regardless of how it looks or whether it passes testing. Replace batteries every 6 months or when low-battery chirping begins.
Can cleaning products trigger smoke detectors?
Yes. Harsh chemicals released during home remodeling, deep cleaning, or painting can cause false alarms. Ventilate thoroughly and consider temporarily relocating detectors if using strong chemical products.
What happens if you never test your smoke detector?
A non-functioning detector provides false security. You may believe your home is protected when the alarm will never sound in a fire. Regular testing is the only way to confirm the detector is operational.
Will ozone set off a smoke detector?
Ozone generators and high concentrations of ozone can potentially trigger smoke detectors, particularly photoelectric models. Keep ozone-producing devices away from detector placement areas.
Can ammonia set off a smoke detector?
Ammonia-based cleaners release fumes that may trigger some smoke detectors. Always ventilate when using ammonia products and avoid spraying near smoke detection equipment.
More related posts
 Arthur Jones Death: What We Know About the NFL Star’s Sudden Passing
 King Cobra: Venom, Size, and Behavior Facts
 Aaron Eckhart: Biography, Personal Life, and Allegations
 Jordan Peele: From Sketch Comedy to Horror Director
 Miranda Otto Age in Lord of the Rings & Biography Facts
 Pia Miller: Biography, Age, Ex-Husband, and Career
 Better Beer: Alcohol, Owner, Health & Reviews (2025)
 Tropical Cyclone Alfred Flooding: Path, Impact & History
